As we all kown,Install dental chairs can seem daunting for dealers or dentists who are new to this equipment. As a large and complex piece of medical furniture with numerous components, proper dental chair installation requires careful attention to detail and often professional technical assistance. At ZIANN, with 18 years of experience as a dental chair manufacturer, we’ve developed a streamlined installation process based on our extensive expertise. This guide will walk you through the essential steps while highlighting common challenges and solutions. For visual learners, we also offer detailed video tutorials to complement these instructions. Should you encounter any issues during installation or have questions about components, our support team is always ready to assist.
Pre-Installation Preparation
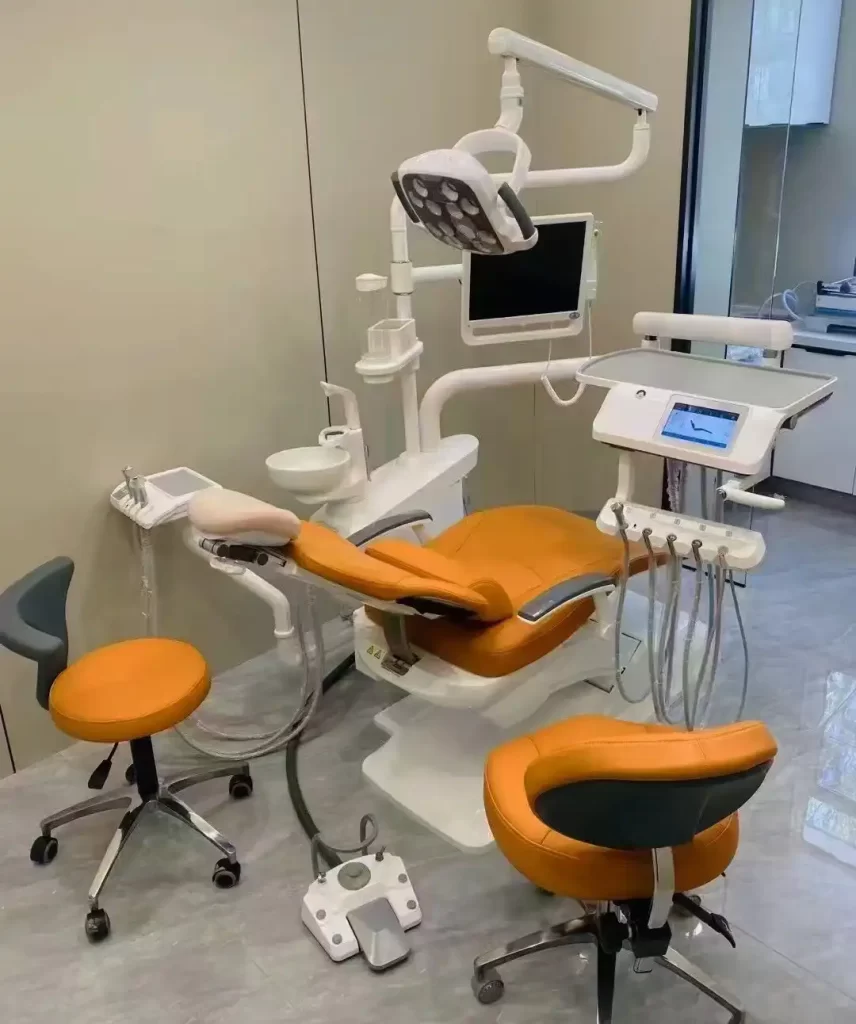
Before beginning the dental chair installation process, thorough preparation is essential to ensure a smooth setup and long-term functionality. Proper planning at this stage can prevent numerous common installation issues and operational problems down the line.
Space assessment is your first critical step. Dental chairs require significant operating space – generally at least 3.5 square meters per unit, with minimum dimensions of 2.5 meters in length and 1.4 meters in width 1. This ensures adequate movement space for dental professionals during procedures. Additionally, maintain at least 0.8 meters of clearance around the chair for easy access, maintenance, and patient movement. Consider the chair’s positioning relative to other equipment, walls, and doorways to optimize workflow while meeting these spatial requirements.
Environmental conditions play a vital role in your dental chair’s performance and longevity. The installation area should maintain a stable temperature between 18°C and 25°C with relative humidity of 40%-60% . These parameters help prevent damage to sensitive electronic components and mechanical parts. Avoid locations near windows with direct sunlight or areas prone to temperature fluctuations like near HVAC vents or exterior doors.
Electrical requirements demand special attention. Most dental chairs operate on 220V power (though some imported models may use 110V), with power consumption typically ranging from 1.5kW to 3kW depending on the model . Ensure your electrical supply remains within ±10% of the rated voltage with frequency deviation not exceeding ±1Hz. The power outlet must include proper grounding protection with resistance no greater than 4Ω for safety. We recommend using a dedicated circuit for each dental chair to prevent power fluctuations affecting operation.
Water supply preparation is equally important. Dental chairs require clean water free of impurities, with hardness not exceeding 150mg/L (measured as calcium carbonate) . Water pressure should be stable between 0.2MPa and 0.4MPa for proper functioning of instruments like triple syringes and scalers. Installation of a reliable anti-backflow device is mandatory to prevent contamination of the water supply system—a critical infection control measure.
Floor quality evaluation is often overlooked but essential. The installation surface must be perfectly level, with deviations not exceeding ±1mm/m . For some models like the SIRONA C8+, special consideration must be given to floor construction—whether it’s concrete, raised wooden flooring, or other materials—as this may require additional support bases . The floor must have adequate load-bearing capacity to support the chair’s weight plus the additional force during adjustments.
At ZIANN, we recommend conducting a complete site survey before delivery, using our detailed checklist that covers all these pre-installation factors. This proactive approach helps identify potential issues before they become costly problems. Our technical team can assist with virtual or on-site surveys for complex installations, ensuring your dental chair is set up for optimal performance from day one.
Unpacking and Component Inspection
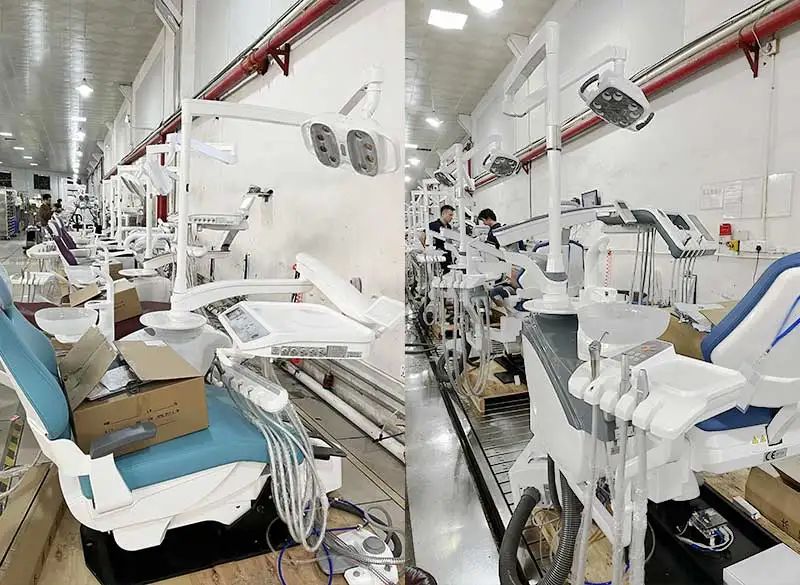
Upon receiving your dental chair, a meticulous unpacking and inspection process is crucial to verify all components are present and undamaged before beginning installation. This stage often causes anxiety for new users due to the numerous parts involved, but with systematic organization, it becomes manageable.
Start by carefully removing all packaging materials, keeping them intact until you’ve confirmed everything has arrived in good condition. Most dental chairs like the Kavo E50 Life ship in multiple packages: typically one containing the unit body and patient element, another with the dentist element, a separate package for the patient chair, and additional boxes for covers, upholstery, and accessories . Lay out all components in a clean, spacious area where they won’t be tripped over or damaged during inspection.
Conduct a thorough visual inspection of each part for any signs of shipping damage. Check for dents, scratches, or cracks on metal and plastic surfaces, paying special attention to hydraulic lines, electrical connections, and moving parts. Verify that all protective coverings installed by the manufacturer for transit are present and intact. Don’t remove these protective films until installation is complete to prevent accidental damage during setup.
Cross-reference the received items with the packing list included in your documentation. Standard components typically include:
- Main chair unit with base
- Dentist’s stool or operator seat
- Assistant’s stool (if applicable)
- Instrument delivery system (often called the “dentist element”)
- Light cure unit or overhead light
- Handpieces and connecting hoses
- Foot control pedal
- Water bottles or connectors
- Electrical cables and power supplies
- Mounting hardware and tools
For specialized models like the SIRONA C8+, pay particular attention to unique components such as the supply elements that need connection to customer-provided points, including suction and drain hoses . The KaVo E50 Life installation manual emphasizes checking for drilling templates and steel support bases that are crucial for proper mounting .
Organize smaller components like screws, washers, and connectors in labeled containers or ziplock bags to prevent loss. Many installation delays occur from missing small hardware pieces that are essential for assembly. If your model includes pre-assembled sections, verify that all transit locks and protective braces are present and properly secured—these are often bright-colored tags or obvious locking mechanisms designed to prevent movement during shipping.
Document any discrepancies or damage immediately with photographs and contact your supplier. ZIANN’s support team can quickly arrange replacement parts for any missing or damaged components, minimizing installation delays. We recommend keeping all packaging materials for at least 48 hours after installation completion in case return shipping is necessary for defective parts.
For complex systems, consider laying out components in the order they’ll be installed, grouping related items together. This visual organization helps technicians work more efficiently and reduces the chance of overlooking critical steps. Many professional installers create an assembly “station” with tools and parts arranged for easy access throughout the installation process.
Remember that proper handling during this stage sets the foundation for a successful installation. Avoid dragging or dropping heavy components, and use appropriate lifting techniques or equipment when moving larger pieces. If you’re unfamiliar with any component’s purpose, consult the installation manual before proceeding—ZIANN’s documentation includes detailed diagrams and descriptions to help identify each part’s function and proper orientation.
Dental Chair Assembly Process
The actual assembly of your dental chair is a methodical process that requires precision and attention to manufacturer specifications. At ZIANN, we’ve streamlined this process based on our 18 years of manufacturing experience, breaking it down into logical phases to ensure proper installation while minimizing common errors.
Begin with base installation and leveling, the foundation of your dental chair setup. Position the main unit base at the predetermined location, ensuring proper clearance from walls—typically 0.15 to 0.2 meters from the back wall for adequate tubing access and ventilation . Use the provided drilling templates (for models like the KaVo E50 Life) to mark anchor points on the floor 3. Secure the base using appropriate fasteners for your floor type, whether concrete anchors for solid floors or specialized hardware for raised or wooden surfaces. Employ a precision level to verify the base is perfectly horizontal in all directions, with deviations not exceeding ±1mm/m . This step is critical as an uneven base can affect all subsequent adjustments and potentially damage sensitive mechanisms.
Proceed to patient chair mounting, which varies slightly between standard and compact models. For standard chairs like those described in the KaVo E50 Life manual, this typically involves attaching the seat mechanism to the base, followed by electrical connections for chair controls . Ensure all transit locks are released before attempting to move any components. When installing the backrest, pay close attention to alignment marks or guide pins that ensure proper orientation. Tighten all fasteners to manufacturer-specified torque values—over-tightening can strip threads while under-tightening may lead to dangerous looseness over time.
The dentist element installation focuses on positioning the equipment delivery system. This includes the instrument tray, handpiece holders, and control panels. Models like the SIRONA C8+ may have specific requirements for positioning relative to the patient chair . Carefully route connecting cables and hoses to prevent kinks or sharp bends that could restrict flow or damage internal wiring. When attaching flexible tubing for air, water, and suction, use only manufacturer-approved clamps or connectors to ensure leak-free operation. Many modern chairs have color-coded or keyed connectors to prevent incorrect hookups—follow these guides precisely.
For lighting system installation, position the overhead light arm according to the recommended height and angle for optimal illumination of the oral cavity. Ensure the light’s movement range doesn’t interfere with other components or nearby walls. Connect power according to electrical specifications, and test all brightness and focus adjustments before proceeding. Some models integrate the light with camera systems or other diagnostic tools—verify these additional functions during testing.
Supply element connections form the chair’s lifeblood, requiring meticulous attention. The SIRONA C8+ installation guide details specific requirements for these connections, including:
- Compressed air lines (typically 4-8mm inner diameter)
- Water supply tubing
- Suction and drain hoses (usually PVC with 36.5mm inner diameter)
- Electrical power cables (often 3×1.5mm² configuration)
- Control wiring for auxiliary equipment
Group these connections neatly within the designated service area (often an 18cm×18cm floor opening for models like the SIRONA C8+) . Use cable management sleeves or clips to maintain organization and prevent tangling. Leave adequate service loops (typically 700mm as specified in several guides) for future maintenance access . Apply thread seal tape or approved sealants to all threaded connections except where manufacturer instructions specifically prohibit it.
Throughout assembly, periodically verify that all moving parts operate smoothly without binding or unexpected resistance. Check that electrical connections are secure and properly insulated, with no exposed conductors. Ensure hydraulic lines (if present) show no signs of leaks at connection points. Keep protective covers in place until final testing to prevent accidental damage to upholstery or polished surfaces.
ZIANN’s installation teams follow a color-coded labeling system for all connections, significantly reducing setup time and potential errors. We recommend creating your own labeling system if not provided by the manufacturer, especially when installing multiple chairs in a practice. Document connection points and routing for future reference during maintenance or reconfiguration.
Remember that while dental chairs share common assembly principles, each model has unique requirements. Always consult the specific installation manual for your unit before proceeding, and don’t hesitate to contact ZIANN’s technical support if any step seems unclear—we’re committed to making your installation experience as smooth as possible.
Utility Connections and Testing
Proper utility connections and comprehensive testing are critical phases in dental chair installation that ensure safe, reliable operation. These steps transform assembled components into a fully functional treatment unit, and meticulous attention here prevents most operational issues encountered in dental practices.
Electrical system connection requires careful adherence to safety standards. Begin by verifying your power supply matches the chair’s requirements—typically 220V (though some models may use 110V) with stable voltage within ±10% of the rated value and frequency deviation not exceeding ±1Hz 1. Connect the power cable to a dedicated circuit with proper grounding (ground resistance ≤4Ω). For models like the SIRONA C8+, ensure the electrical connection uses 3×1.5mm² cable (live, neutral, ground) protected by a 10A circuit breaker . Route cables to avoid pinch points or areas where they might be stepped on, using cable channels or protective covers where necessary.
Water system hookup demands attention to quality and pressure. Connect to a clean water source with hardness not exceeding 150mg/L (as calcium carbonate) 1. Install the provided anti-backflow device as the first connection point to prevent cross-contamination—this is both a performance requirement and infection control essential. Adjust supply pressure to the recommended range (usually 0.2-0.4MPa) using a pressure gauge . For chairs with internal water reservoirs, fill and prime according to manufacturer instructions before testing. Check all water line connections for leaks, tightening compression fittings as needed while avoiding over-tightening that could crack plastic components.
Air supply connections power various dental instruments and chair functions. If your practice uses central compressed air, verify the supply meets the chair’s requirements for pressure and purity (typically filtered, dry air at specific pressure ranges). Connect using manufacturer-approved tubing, securing connections with appropriate clamps. For chairs with built-in compressors, ensure adequate ventilation around the unit and test compressor operation during the system check. Listen for unusual noises that might indicate installation issues or transit damage.
Suction system installation is vital for patient treatment and comfort. Connect the high-volume evacuator (HVE) and saliva ejector lines to your central vacuum system or independent suction unit. The SIRONA C8+ specifies PVC tubing with 36.5mm inner diameter for drain lines, with all bends using 45° angles to maintain proper flow . Test suction power at various settings, checking for consistent performance across all operatory locations if multiple chairs share a system. Ensure drain traps are properly installed and accessible for routine cleaning.
Conduct preliminary functional tests before proceeding to full system checks:
- Verify all emergency stop controls immediately halt chair movement
- Test chair positioning controls through their full range of motion
- Check instrument tray movement and locking positions
- Confirm proper operation of foot controls
- Test all lighting controls and intensity adjustments
- Cycle handpiece connectors through activation sequences
Perform comprehensive water system testing:
- Run water through all outlets (three-way syringe, handpieces, cup filler) checking for consistent flow
- Verify proper operation of water shut-off valves
- Test water temperature controls if equipped
- Check for leaks at all connection points during operation
- Verify automatic flush systems activate as programmed
Execute detailed air system checks:
- Test air flow through all handpieces and air syringes
- Verify proper operation of air-driven instruments
- Check for air leaks at all connections
- Monitor compressor cycle times if equipped
- Confirm pressure adjustment controls function properly
Conduct final operational verification with the chair in various positions:
- Test all functions with chair raised to maximum height
- Repeat tests at lowest position
- Verify operation in Trendelenburg and reverse Trendelenburg positions if equipped
- Check for any unusual noises during movement
- Confirm smooth transitions between positions without hesitation or jerking
Document all test results, noting any anomalies that might require adjustment or service. ZIANN recommends maintaining these records as part of your equipment maintenance history. Pay particular attention to any error codes displayed on digital control panels, consulting the manual for interpretation and resolution steps.
For integrated systems with dental delivery units, imaging equipment, or other peripherals, test all interface connections and communication protocols. Verify that shared resources like lighting or display systems properly switch control between connected devices. Ensure any networked systems have appropriate IP configurations and security settings applied.
Before declaring installation complete, perform a final safety inspection:
- Verify all protective covers are installed
- Confirm no sharp edges or pinch points are exposed
- Check that all warning labels and instructional decals are visible
- Ensure emergency release mechanisms are accessible and functional
- Test electrical safety measures like ground fault protection
ZIANN’s installation teams complete a 25-point checklist during this phase, ensuring no detail is overlooked. We recommend practices develop similar checklists tailored to their specific equipment and operational requirements. Remember that thorough testing now prevents patient disruptions later—investing time in meticulous verification pays dividends in equipment reliability and practice efficiency.
Final Adjustments and Professional Tips
After completing the physical installation and system testing, final adjustments transform your dental chair from technically operational to optimally functional for clinical use. These finishing touches significantly impact both practitioner ergonomics and patient comfort, while professional tips from ZIANN’s 18 years of experience can help you avoid common pitfalls and maximize your equipment’s potential.
Ergonomic positioning is the cornerstone of effective dental chair use. Adjust the chair height to suit the primary operator’s posture—when seated on the dentist stool with feet flat, your thighs should parallel the floor while maintaining easy access to the patient’s oral cavity 2. The backrest should recline smoothly to various positions while providing adequate lumbar support for patients of different sizes. Fine-tune the headrest to support the patient’s neck without forcing excessive extension, which can cause discomfort during lengthy procedures 2. Remember that proper ergonomics reduce fatigue for dental professionals and minimize patient movement during treatment.
Instrument delivery system optimization requires careful attention to workflow patterns. Position instrument trays and handpiece holders so frequently used items are within easy reach—typically within a 14-16 inch “primary zone” from the operator’s position. Adjust tubing lengths to allow natural movement without excessive slack that could tangle or interfere with procedures. For chairs with multiple operator positions (like four-handed dentistry setups), verify all components are accessible from each working position without awkward stretching or repositioning.
Lighting calibration dramatically affects clinical visibility. Adjust the overhead light to illuminate the oral cavity without creating shadows or glare. The ideal position typically centers the light beam approximately 30-36 inches from the patient’s mouth at a 45-degree angle. Test lighting with a patient simulator or colleague to verify optimal illumination across various treatment positions. For LED systems, check color temperature settings if adjustable—most dental procedures benefit from daylight-balanced (5000-6500K) lighting for accurate color rendition.
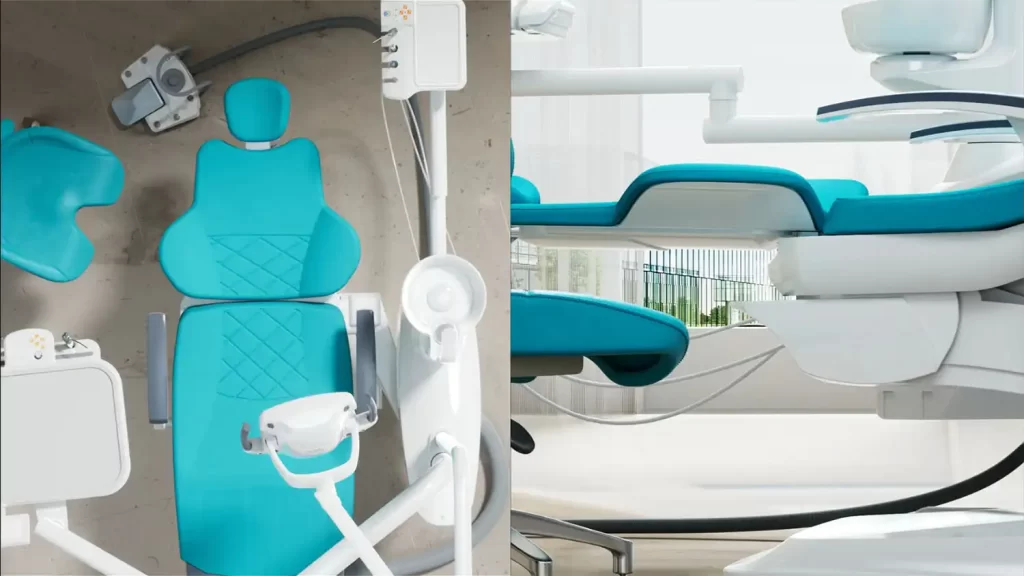
Patient comfort features should be thoroughly tested before clinical use:
- Verify cushion firmness and contouring support proper patient positioning
- Test heated seat functions if equipped, checking temperature controls and safety limits
- Adjust armrests to accommodate various patient body types
- Confirm smooth operation of all position memory presets
- Check accessibility of patient controls for those with limited mobility
Operational fine-tuning addresses subtle performance characteristics:
- Adjust chair movement speed for smooth transitions between positions
- Calibrate foot control sensitivity to match operator preference
- Set instrument activation delays or ramp-up times if programmable
- Balance air/water spray ratios on triple syringes
- Adjust suction valve responsiveness for optimal fluid control

